

The full recipe with step-by-step pictures and all details is given below:
For me, personally, the addition of coffee gives a little more depth and richness to the flavor (of the already pretty rich flavor) of a true Brownie.
Secret Tip: I prefer to use Brown Sugar in my Brownie recipe for that extra depth in flavor. You may use the regular white castor sugar if you prefer.
Here, I share my favorite recipe for a Dense, Fudgy, Rich Brownie. Its super easy and quick. Give it a try and share your own experience and comments about it.
What you’ll need: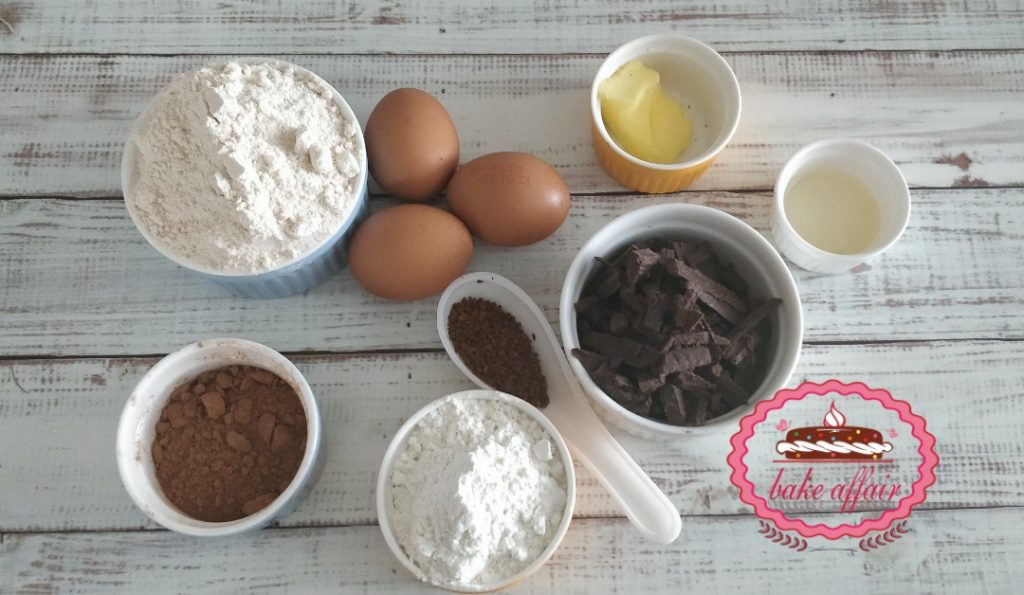
- 100 gm of butter
- 3 eggs
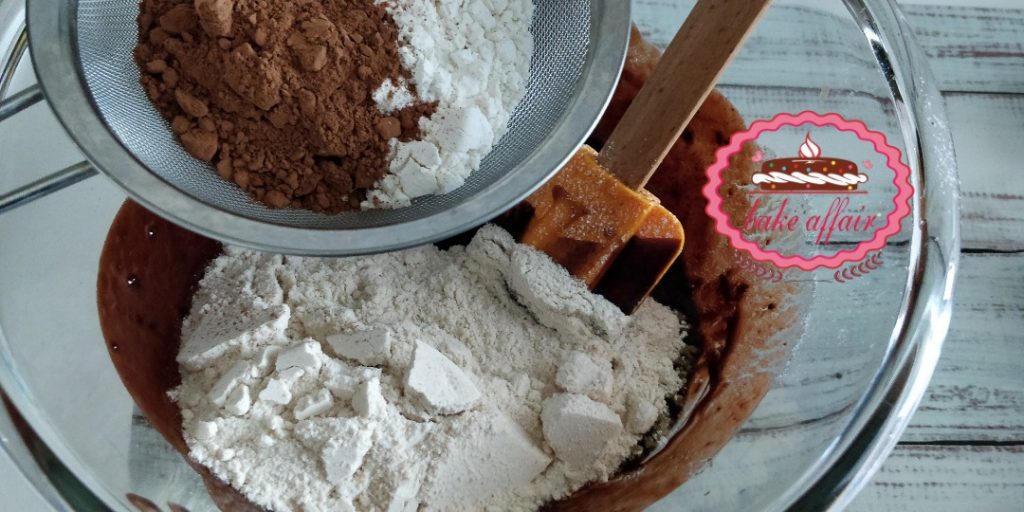
- 100 gm of flour
- 20 gm of cocoa powder
- 100 gm of dark chocolate
- 300 gm of brown or white sugar
- 1 tsp of coffee – optional
- 1 tsp of vanilla
How To Make It:
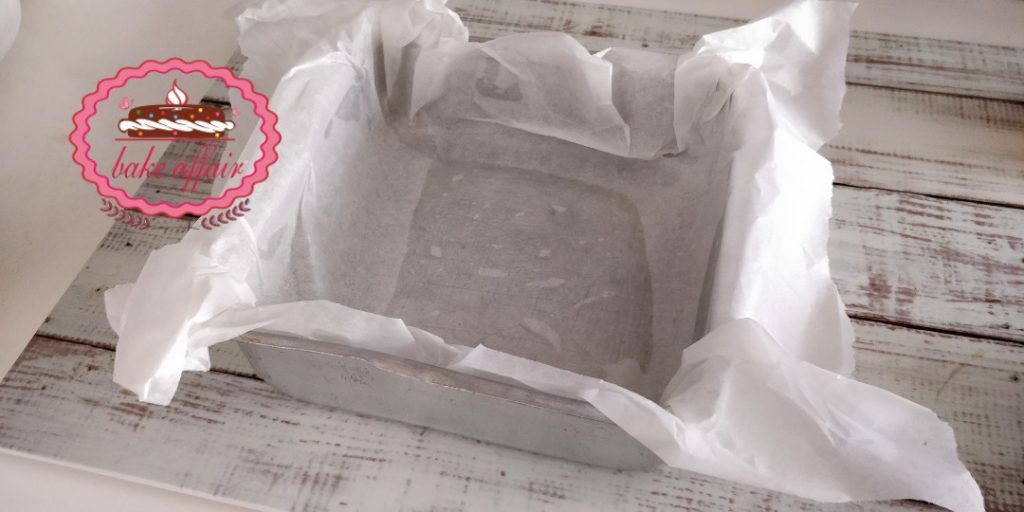
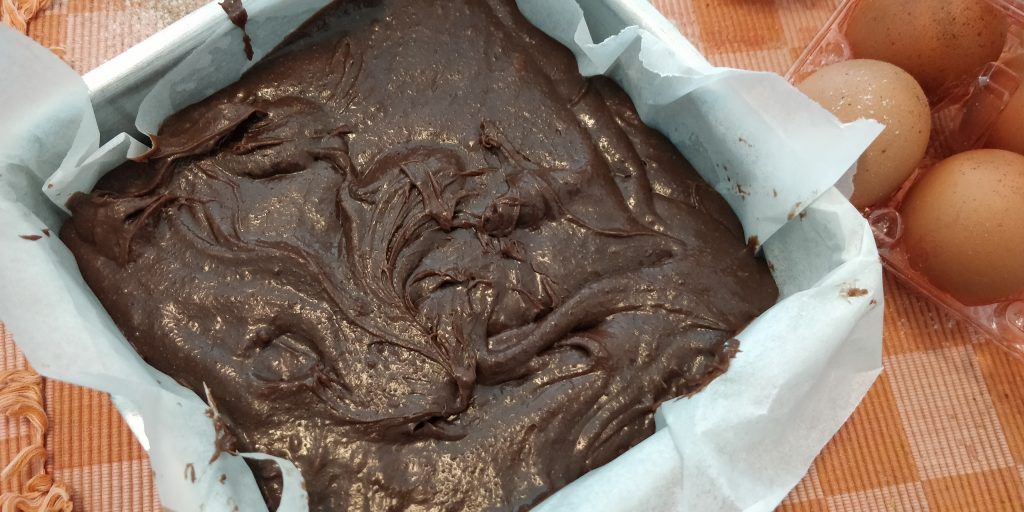
- Preheat your over to 180º C. Line an 8×8-inch square baking tin with parchment/baking paper. Use a paper size much bigger than the actual tin base so that it sits in the tin the way you can see here.
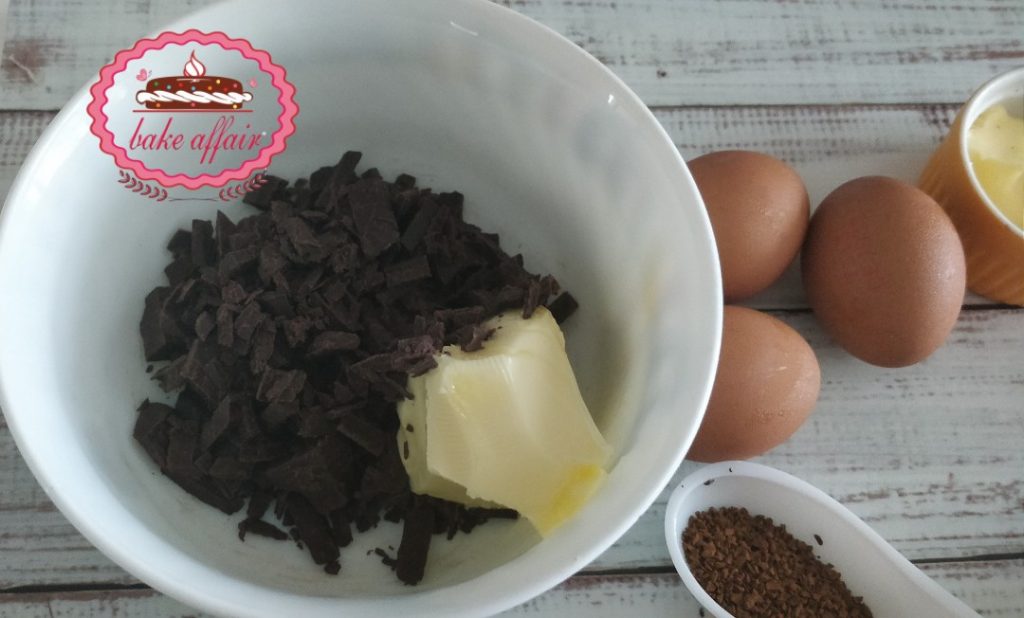
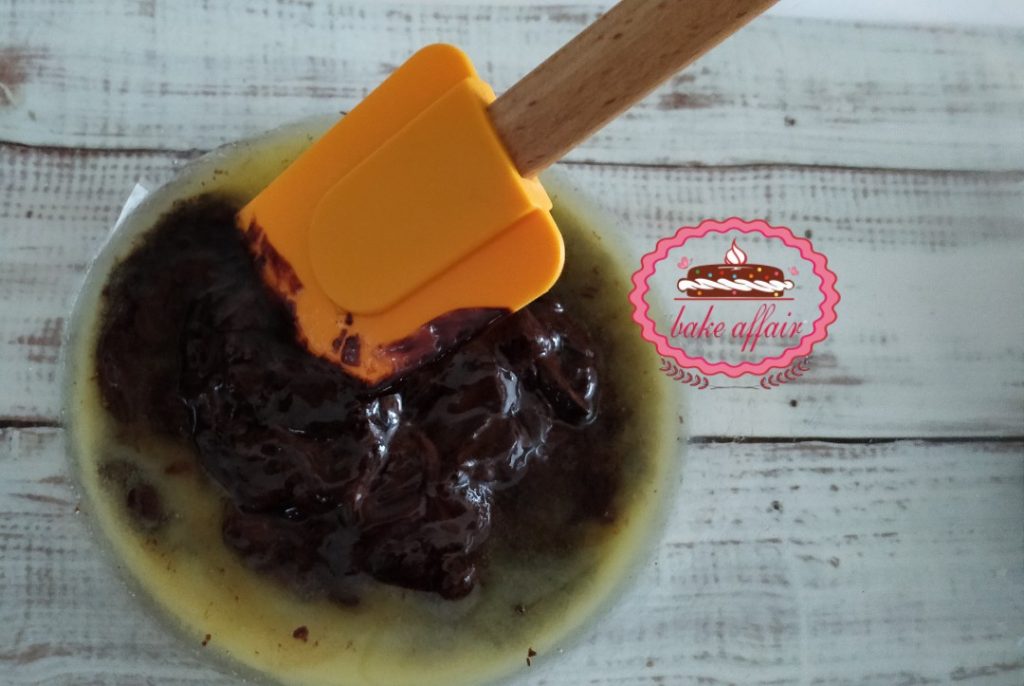
- Melt the chocolate and butter together either in a Double boiler or in the microwave. Stir nicely as it melts into a shiny smooth mixture.
- Let it cool down to room temperature.
- Add in the sugar, sifted flour and cocoa powder, eggs, and vanilla. Bring everything together with a metal spoon or a silicone spatula.
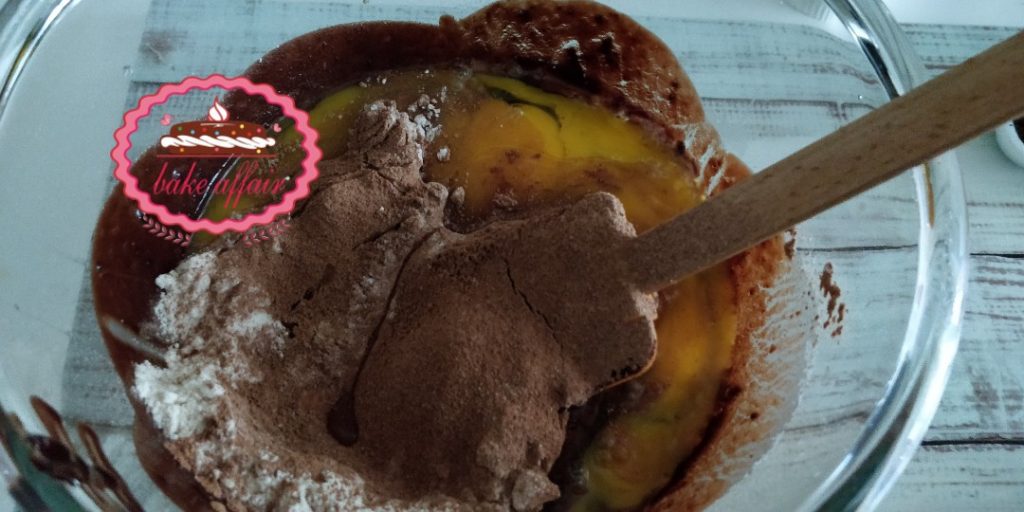
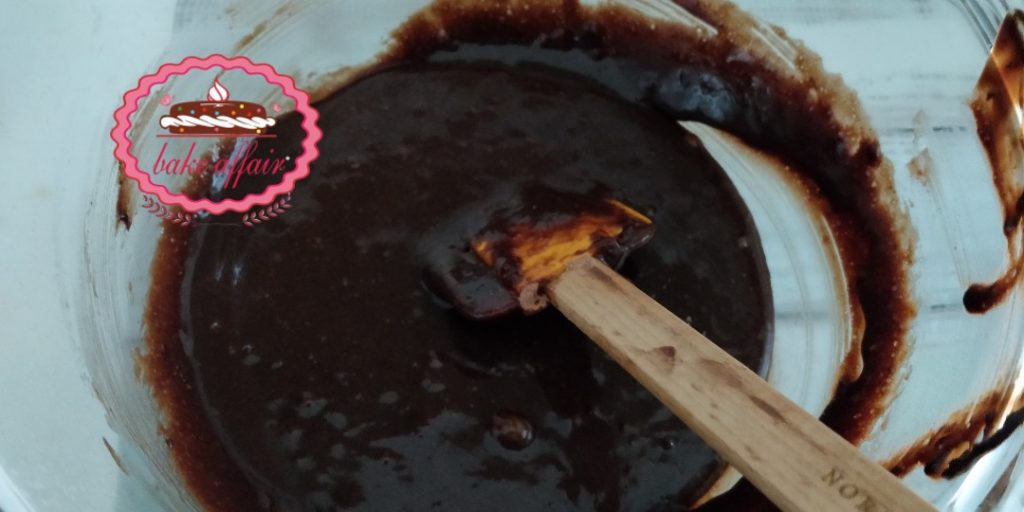
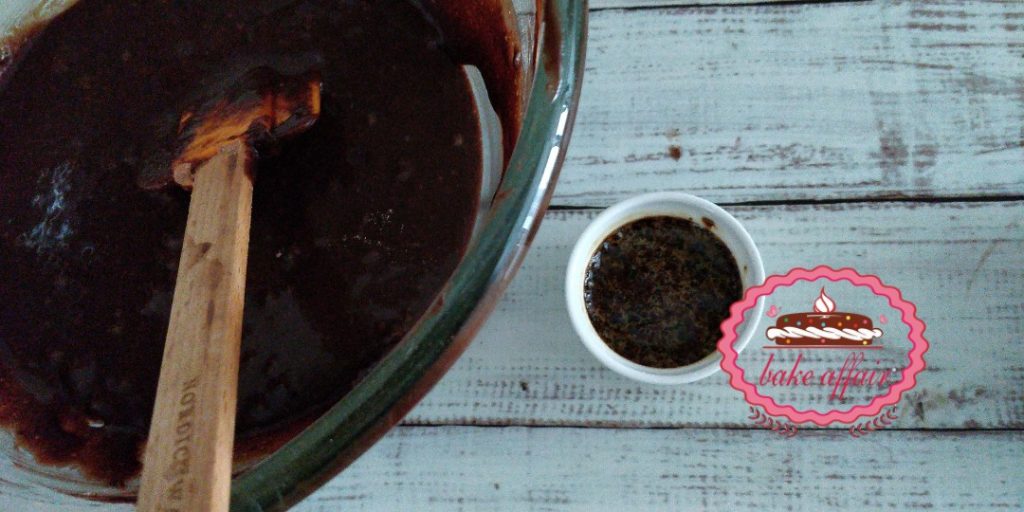
- Combine well till you are sure no lumps remain. Mix the coffee in a tablespoon of water and add it if you are using it.
- Pour this batter into the baking tin you prepared and bake it for about 40 minutes or till done.
- Test for doneness: Remember that this brownie has a moist crumb so you may find the same clinging to your skewer when it’s done.
- Place the baking tin on a wire rack in a well-ventilated room. Please be patient and wait for a minimum 15 minutes before you attempt to take the brownies out of the pan. We want that delicate crust to develop and be stable enough to handle your attack. (Yes you may say “Look who’s talking!!” as this patience lecture is an overstatement coming from me. But trust me on this okay.)

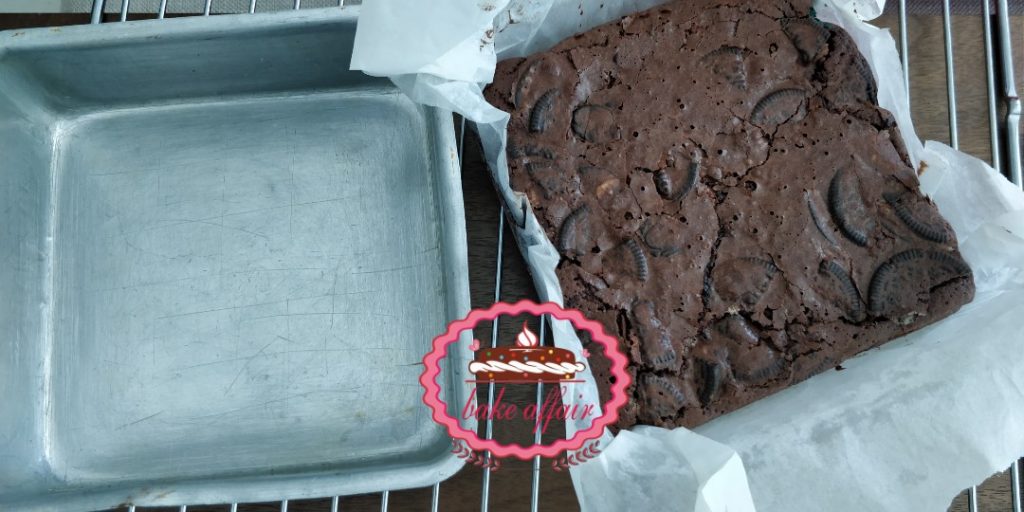
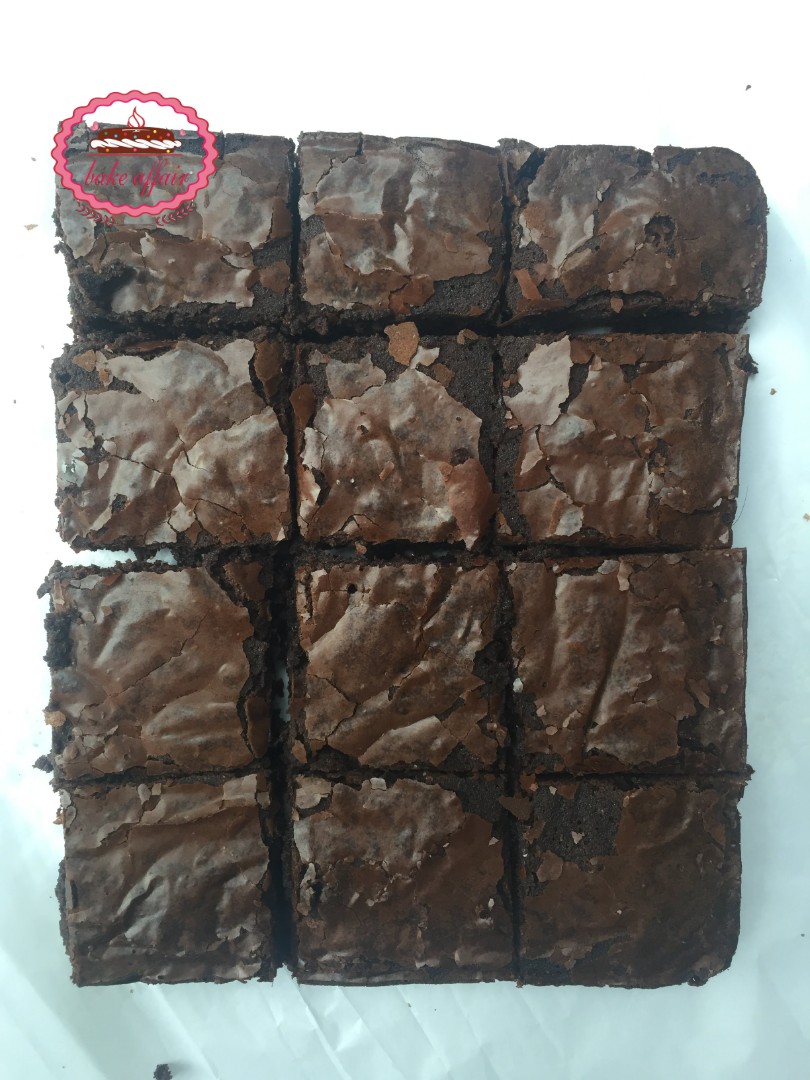
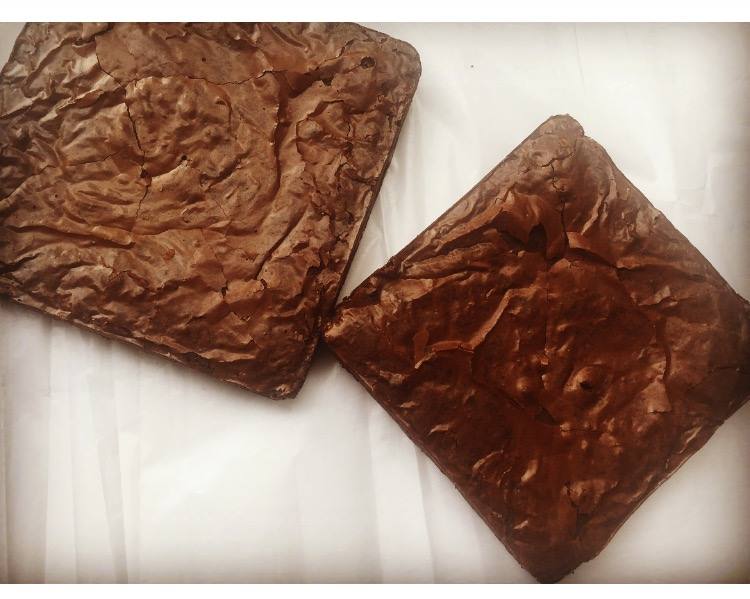
- Just lift the baking paper by its overhang and place the baked brownie onto a wire rack to cool. Whoa, look at the crackling crust! Don’t you love it?
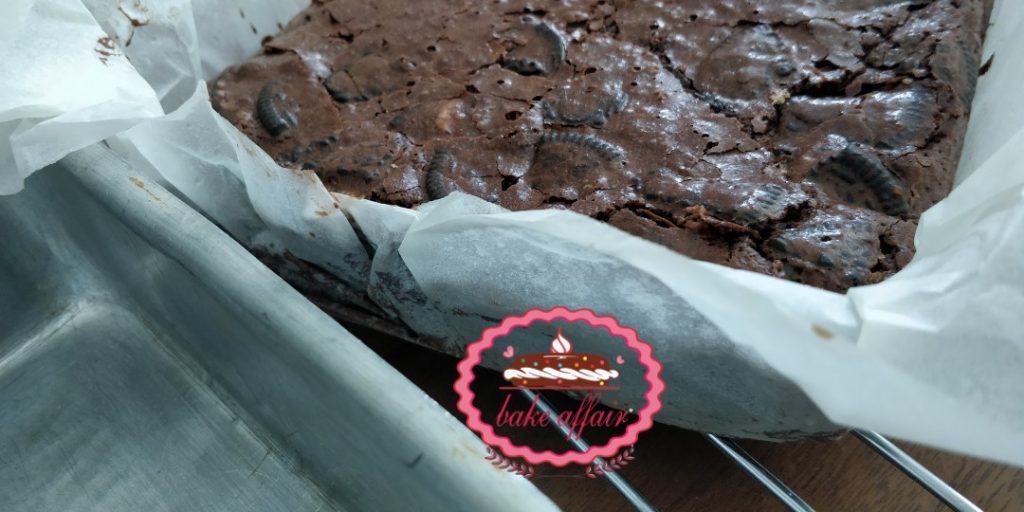
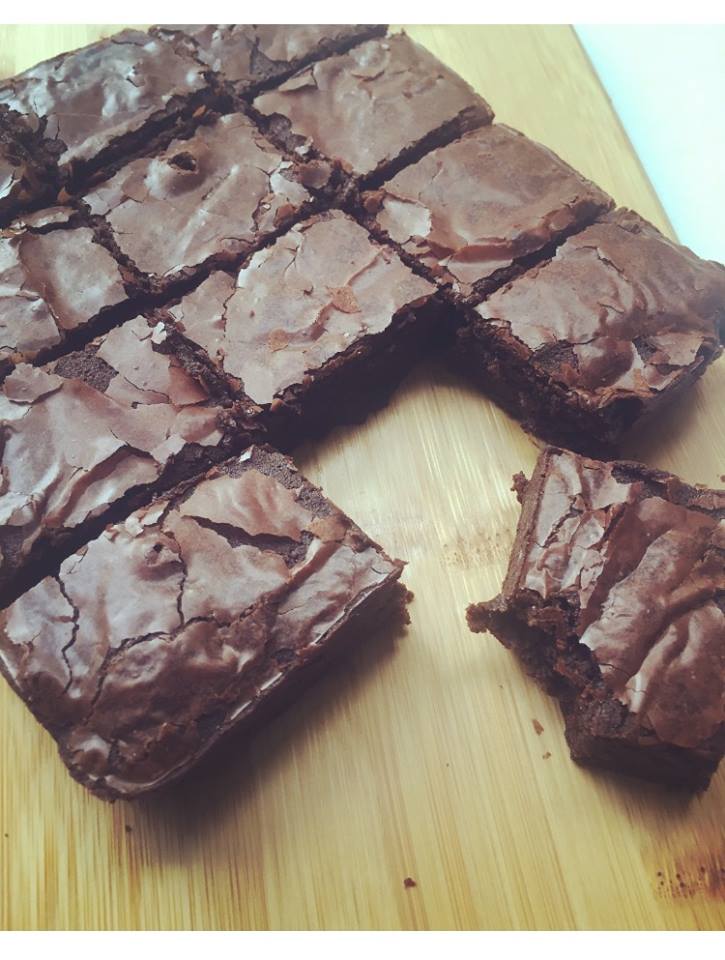
- Once it has cooled completely, take it out of the pan along with the parchment lining. Place it on a stable surface. Gently cut into squares. I can’t help saying (though it’s already clearly visible) how fudgy, sticky and dense the brownie is from inside!
Eat straight away and save some for the, kids, when they come back from school. It will just make their evening glass of milk all the more tempting.
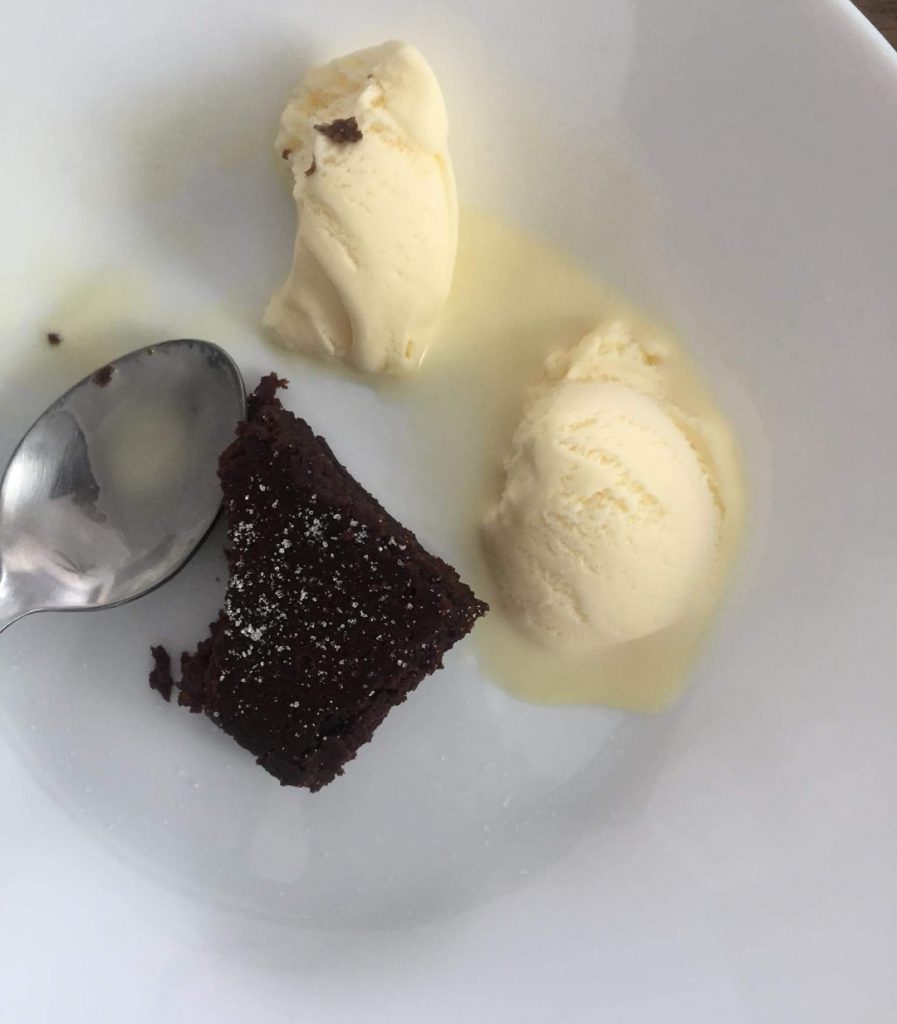
And then save some for after dinner to serve with Vanilla Ice cream!!![]()
Important Note: So as I promised in the beginning of this post, let me now give you a few variations of this Brownie. Actually there are quite a few of them. I will give you an idea and then you could let your imagination run wild and don’t forget to share with me what variation you tried!!!
Variations
1.Strawberry Brownies 
You all know by now I’m such a citrus and fresh berries lover. So here, I layered fresh chopped strawberries on my brownie, poured chocolate ganache on it and then, because I was still not satisfied, loaded it with more fresh strawberries!!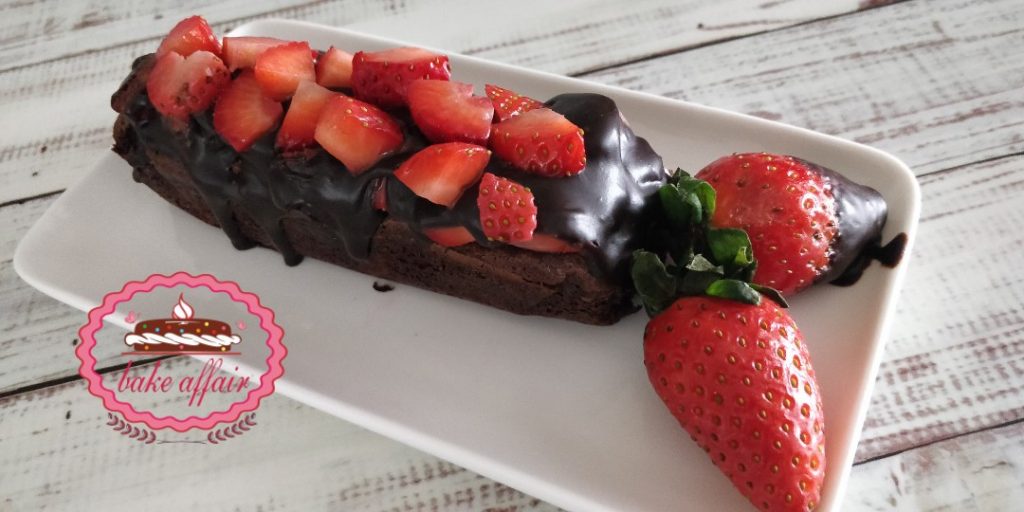
2. Oreo Brownies
Once your brownie batter is ready, pour half of it in the baking tin, break up a few Oreos and layer them on this. Then pour the rest of the brownie batter on top. Bake it as normal.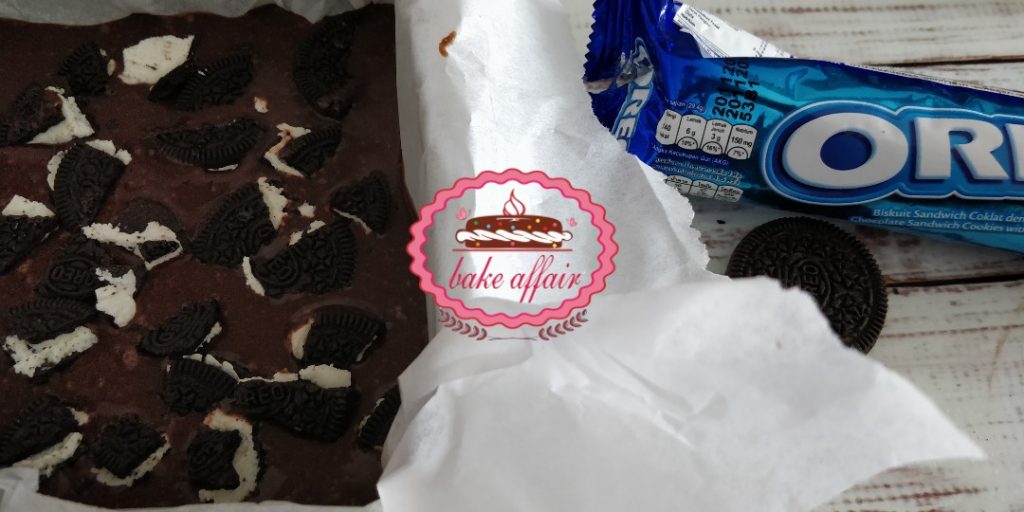
Now again, if you’re like me, you wont be satisfied with just having the Oreos inside your brownie. You need more of course! Here I poured chocolate ganache (because I happened to have it on hand) and then placed more Oreos on top.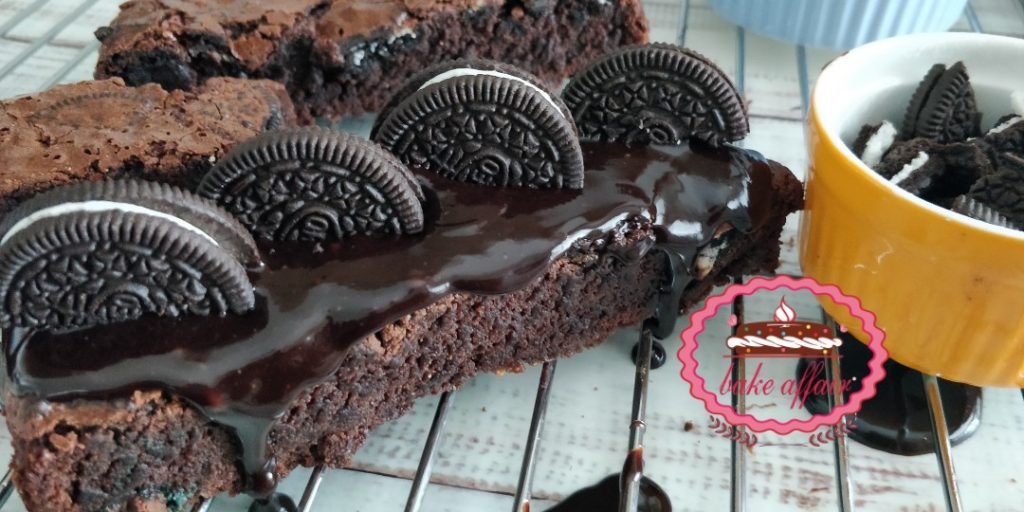
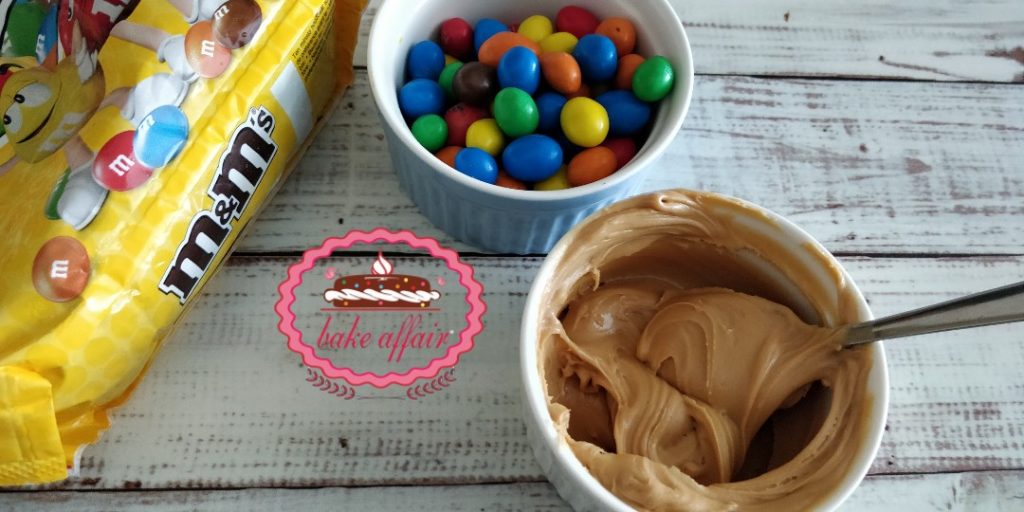
3. Peanut Butter and M&M Brownies
 Another killer combination!
So just like we did for the Oreo brownies, you can layer M&Ms after pouring half the brownie batter in the tin. Then the pour the rest of the batter on top of these and bake like usual.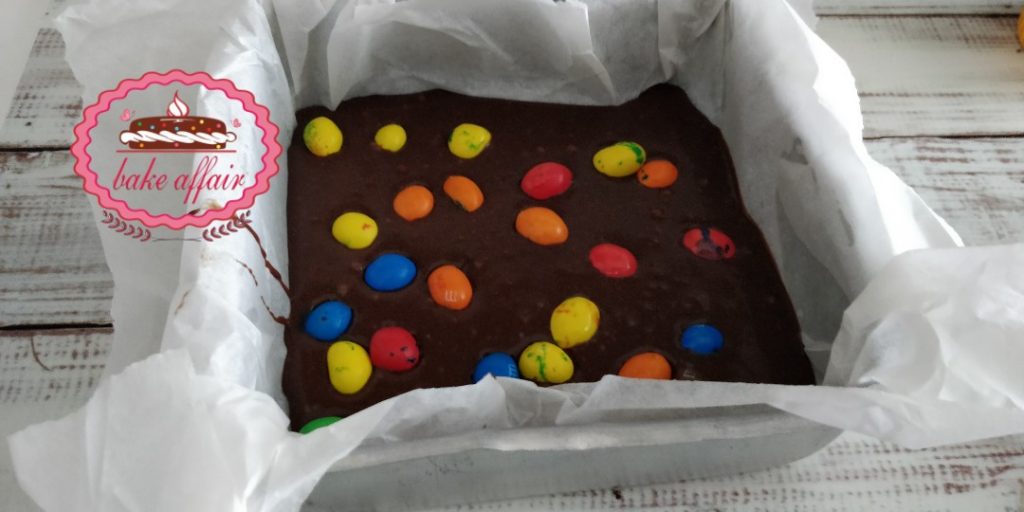
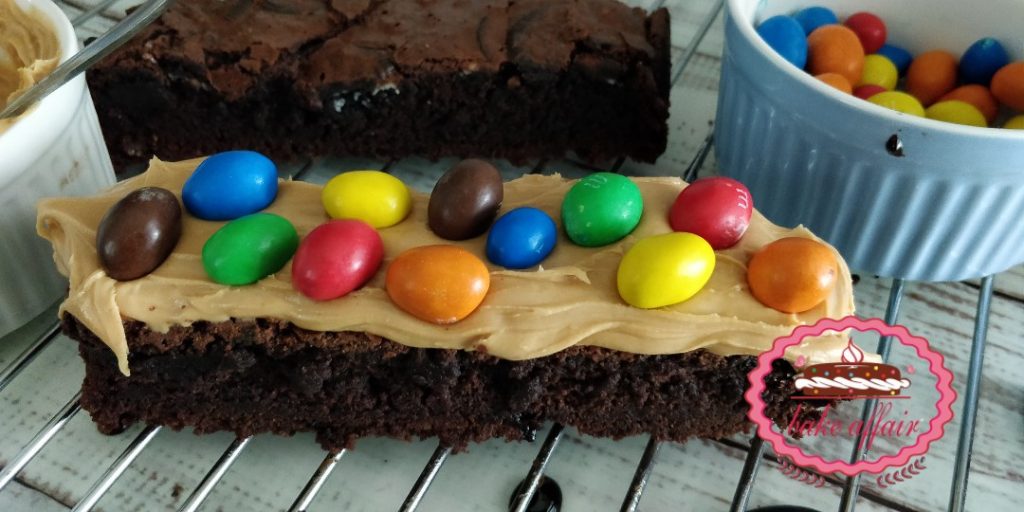
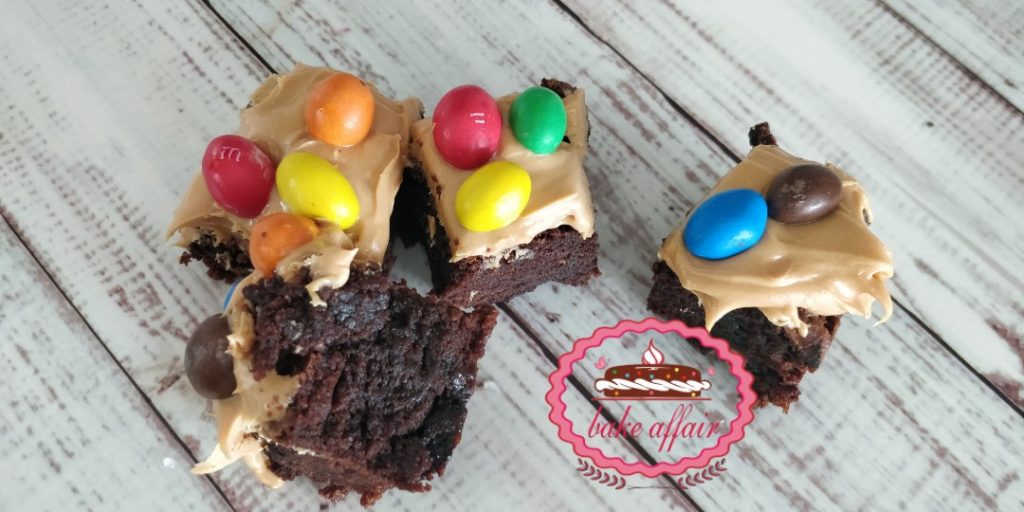
Once out of the oven and cooled, layer the top with peanut butter and decorate with more M&Ms!!! (I can never have enough!!)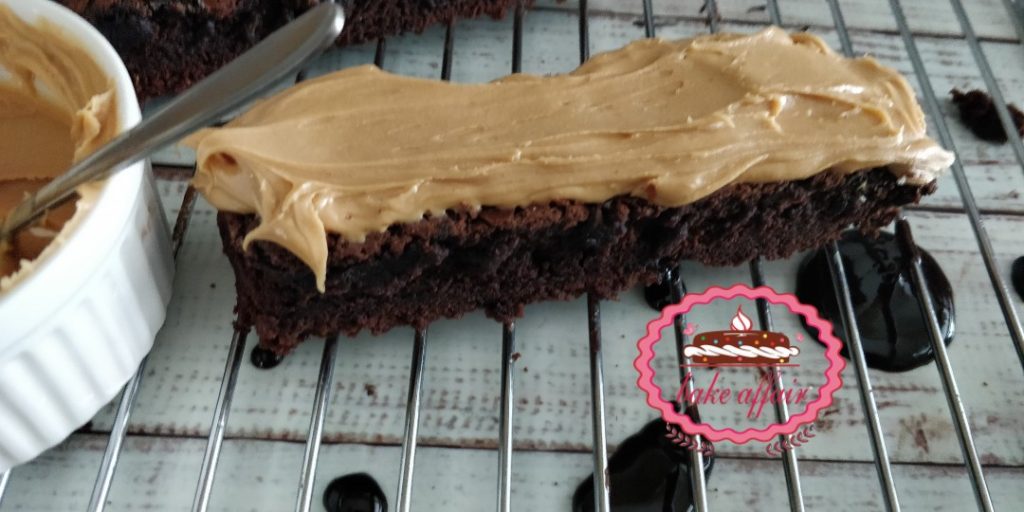
4. Ganache Frosted Brownies
Make a Dark Chocolate Ganache and frost your Brownies with that. Its sinful believe me!!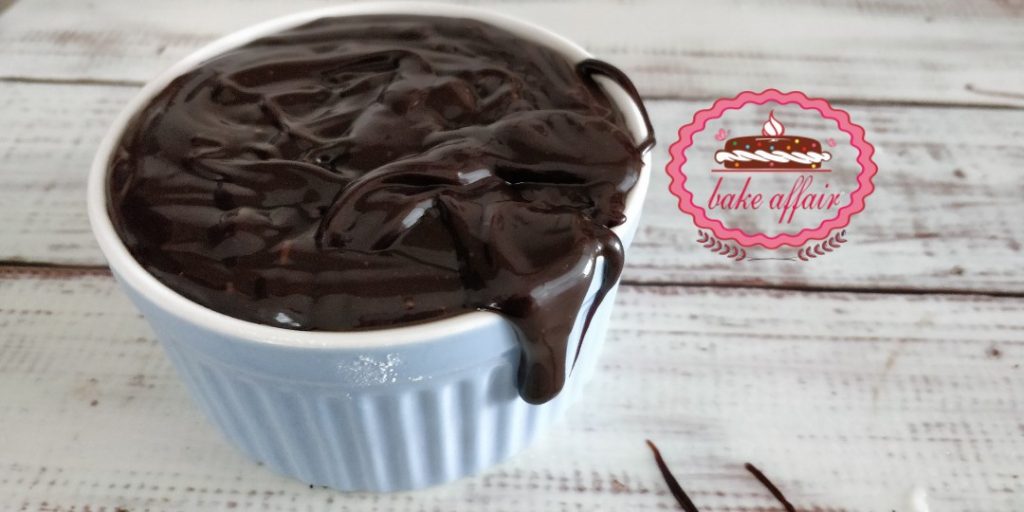
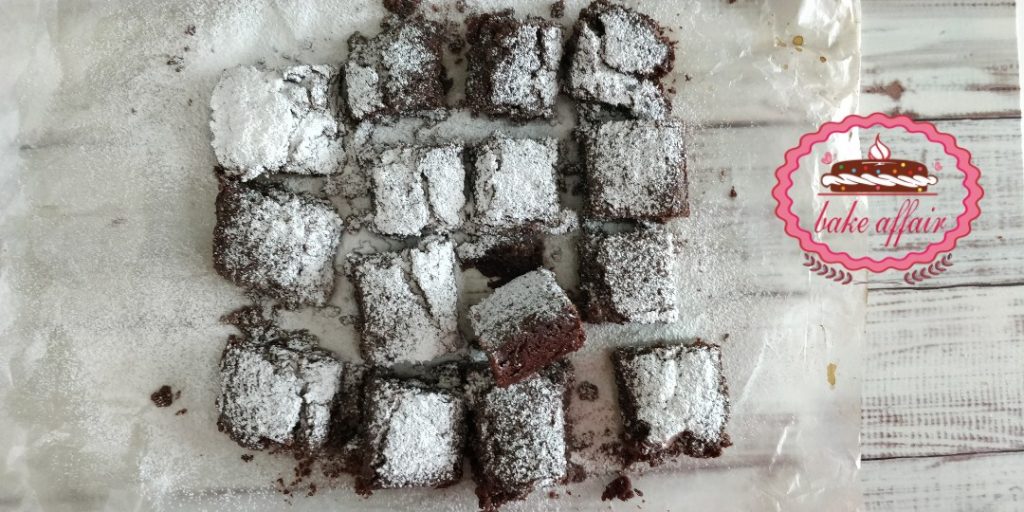
5. Simply Dust With Powdered Sugar
Classy, quick, easy!!Go good old classic with a dusting of powdered sugar over your brownie. Looks snowy and just beautiful!!
6. Dust your brownies with Cocoa Powder.
7. Dust the brownie with Coffee powder if you are like me.
8. Salted Caramel Brownies
Frost your cooled brownie with Salted Caramel. Let it set and then cut into squares.
Again, the variations have no end. Now its your turn to tell me how you like your Brownie!!
So what are you waiting for? Grab your prettiest apron and a whisk, put on your favorite song and start creating the magic!! Do share your experience of this post and recipe and your views and opinions! I would love to hear them!!
So what are you waiting for? Grab your prettiest apron and a whisk, put on your favorite song and start creating the magic! Do share your experience of this post and recipe and your views and opinions! I would love to hear them!
Connect with me on:
▶️Instagram: https://www.instagram.com/anjalisbakeaffair
▶️Facebook: https://www.facebook.com/anjalisbakeaffair
▶️Twitter: https://www.twitter.com/anjalisbkaffair
▶️Pinterest: https://in.pinterest.com/anjalisbakeaffair/

Brownie Love
Ingredients
100 gm of butter
3 eggs
100 gm of flour
20 gm of cocoa powder
100 gm of dark chocolate
300 gm of brown or white sugar
1 tsp of coffee – optional
1 tsp of vanilla
Directions
- Preheat your over to 180º C. Line an 8×8-inch square baking tin with parchment/baking paper. Use a paper size much bigger than the actual tin base so that it sits in the tin the way you can see here.
- Melt the chocolate and butter together either in a Double boiler or in the microwave. Stir nicely as it melts into a shiny smooth mixture.
- Let it cool down to room temperature.
- Add in the sugar, sifted flour and cocoa powder, eggs, and vanilla. Bring everything together with a metal spoon or a silicone spatula.
- Combine well till you are sure no lumps remain. Mix the coffee in a tablespoon of water and add it if you are using it.
- Pour this batter into the baking tin you prepared and bake it for about 40 minutes or till done.
- Test for doneness: Remember that this brownie has a moist crumb so you may find the same clinging to your skewer when it’s done.
- Place the baking tin on a wire rack in a well-ventilated room. Please be patient and wait for a minimum 15 minutes before you attempt to take the brownies out of the pan. We want that delicate crust to develop and be stable enough to handle your attack. (Yes you may say “Look who’s talking!!” as this patience lecture is an overstatement coming from me. But trust me on this okay.)Just lift the baking paper by its overhang and place the baked brownie onto a wire rack to cool.
- Once it has cooled completely, take it out of the pan along with the parchment lining. Place it on a stable surface. Gently cut into squares. I can’t help saying (though it’s already clearly visible) how fudgy, sticky and dense the brownie is from inside!
- Eat straight away and save some for the kids, when they come back from school. It will just make their evening glass of milk all the more tempting.
- Once it has cooled completely, take it out of the pan along with the parchment lining. Place it on a stable surface. Gently cut into squares and serve with a scoop of icecream!
this is my looove ..my brownie… which I can never share/or want to share with anyone.. even the one whome I love the most…when it’s served to me, I am on 7th heaven…bakery was far from my house so it was once in a while treat…now thanks to your sharing the recipe, I will make it and have it.. anytime..
I know what you mean Sadaf!! We are the same in that manner!! Send in pictures of your brownies when you bake’em. Coz I’ll be a waitin’
While reading itself I got a feeling that I m already eating and enjoying the taste 😊
Will try to make it in next school holidays 😊😊
That’s the idea Sravanthi… To get you to make your favorite recipes!! Good luck and do share your pictures here!!